I’ve been tinkering with Arduino stuff for quite a while now and sometimes I like to promote the project from the breadboard to the solder stage. However, that always meant getting some perfboard and before I could solder the electronics of the project, I’d first need to boilerplate the PCB by soldering an ATmega328P circuit. So I took this opportunity to finally learn PCB design and I implemented a boilerplate PCB that already has the ATmega328P onboard with perfboard around it.
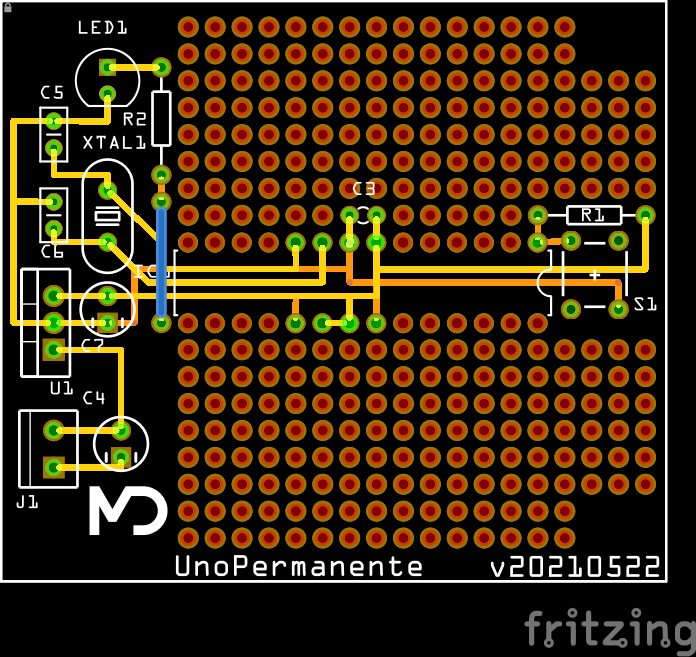
After trying out some PCB design software, I settled on Fritzing. While it does have its quirks I find Fritzing to give just the right balance of simplicity and control, especially for a beginner. I designed the PCB straightaway in the PCB view and this is the design I came up with:

There is an LED connected to Pin 13 and a reset button. The empty corners are for mounting holes you can drill for your specific case.
I then used the suggested PCB manufacturer, Aisler, to order 3 PCBs. I’ll update this post once they arrive and I’ve soldered something on it. If this pilot is successful, I might extend it into a Permanente series with different processors and use cases. Also, you can check the project file out on GitHub.


